本文最后更新于:星期日, 四月 5日 2020, 6:40 晚上
Ubuntu18.04搭建web环境
如题所示,我准备在Ubuntu18.04搭建一个web环境,要安装的东西有Apache、Mysql、PHP,本来是想在直接我的服务器上捣鼓的,但是第一次搞,怕把我白嫖来的服务器搞坏,所以先拿虚拟机练练手,写篇文章记录下。
apache2
安装
sudo apt install apache2 -y
安装完后可以通过访问自身ip查看apache的默认page页面,上面有一些关于apache2配置的说明,简单阅读下。
apahce2的配置布局如下
/etc/apache2/
|-- apache2.conf
|       `--  ports.conf
|-- mods-enabled
|       |-- *.load
|       `-- *.conf
|-- conf-enabled
|       `-- *.conf
|-- sites-enabled
|       `-- *.conf
- apache2.conf 是主要的配置文件,在服务器启动时,它通过包含其他所有剩余的配置文件来整理各个部分。
- ports.conf 始终包含在主配置文件中,它用于确认传入连接的监听端口,我们随时可以自定义这个文件
- 在 mods-enbaled , conf-enabled和 sites-enabled 目录下,存在着分别管理模块,全局配置片段/虚拟主机配置的特定配置片段的配置文件
因为需要使用到环境变量,所以apache2要通过 /etc/init.d/apache2或者apache2ctl来启动,使用/usr/bin/apache2的话 将无法使用默认配置
网页的根目录默认是/var/www/html,如果需要修改的话可以通过/etc/apache2/apache2.conf 来修改
配置
配置apache允许的用户
创建组:groupadd apache
创建用户:useradd -r -g apache apache
在apache的配置文件apache2.conf中设置User和Group

修改网站根目录的所有者以及网站文件权限
root@ubuntu:/var/www# chown -R apache:apache .
root@ubuntu:/var/www/html# chmod 744 -R .
重启apache
sudo systemctl restart apache2
查看apache2配置
sudo apachectl -S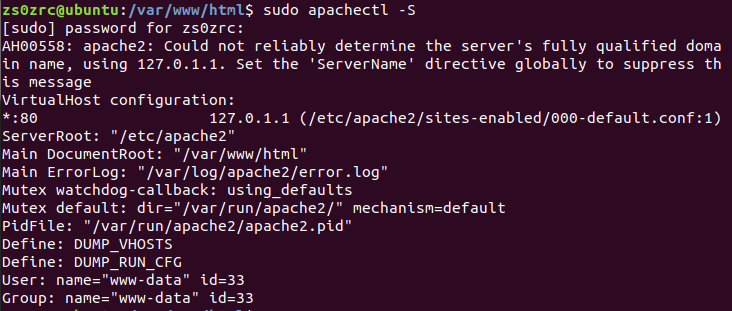 这条命令会打印出apache的配置的具体信息,其中主要的是VirtualHost configuration,它给出了apache当前使用的配置文件,要注意的是 这里显示的配置文件路径
/etc/apache2/sites-enabled/000-default.conf这个只是一个软连接,真正的配置文件在/etc/apache2/sites-available/下。修改完配置文件可以通过
sudo apache2ctl configtest命令来检查配置文件语法是否正确。然后执行下面两条命令使配置生效
sudo a2ensite ××××.conf
sudo systemctl restart apache2
mysql
mysql大家应该都很熟悉了,一款数据库管理软件
安装方法
sudo apt install mysql-server -y
基本配置
初始化配置
zs0zrc@ubuntu:/var/www/html$ sudo mysql_secure_installation

Securing the MySQL server deployment.

Connecting to MySQL using a blank password.

VALIDATE PASSWORD PLUGIN can be used to test passwords
and improve security. It checks the strength of password
and allows the users to set only those passwords which are
secure enough. Would you like to setup VALIDATE PASSWORD plugin?

Press y|Y for Yes, any other key for No: Y

There are three levels of password validation policy:

LOW    Length >= 8
MEDIUM Length >= 8, numeric, mixed case, and special characters
STRONG Length >= 8, numeric, mixed case, special characters and dictionary                  file

Please enter 0 = LOW, 1 = MEDIUM and 2 = STRONG: 0
Please set the password for root here.

New password:

Re-enter new password:

Estimated strength of the password: 50
Do you wish to continue with the password provided?(Press y|Y for Yes, any other key for No) : y
By default, a MySQL installation has an anonymous user,
allowing anyone to log into MySQL without having to have
a user account created for them. This is intended only for
testing, and to make the installation go a bit smoother.
You should remove them before moving into a production
environment.

Remove anonymous users? (Press y|Y for Yes, any other key for No) : y
Success.


Normally, root should only be allowed to connect from
'localhost'. This ensures that someone cannot guess at
the root password from the network.

Disallow root login remotely? (Press y|Y for Yes, any other key for No) : N

 ... skipping.
By default, MySQL comes with a database named 'test' that
anyone can access. This is also intended only for testing,
and should be removed before moving into a production
environment.


Remove test database and access to it? (Press y|Y for Yes, any other key for No) : y
 - Dropping test database...
Success.

 - Removing privileges on test database...
Success.

Reloading the privilege tables will ensure that all changes
made so far will take effect immediately.

Reload privilege tables now? (Press y|Y for Yes, any other key for No) : y
Success.

All done!
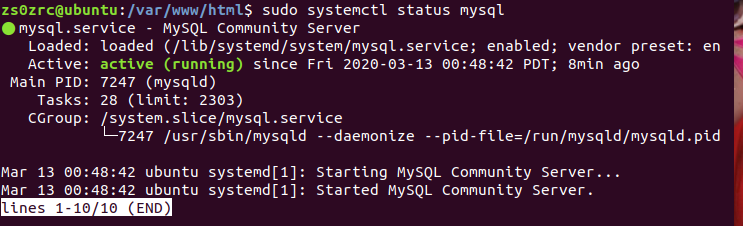
测试mysql服务是否正常
远程连接配置
因为Ubuntu下的mysql-server默认是只运行本机连接访问的,如果想远程连接的话,就要配置一下
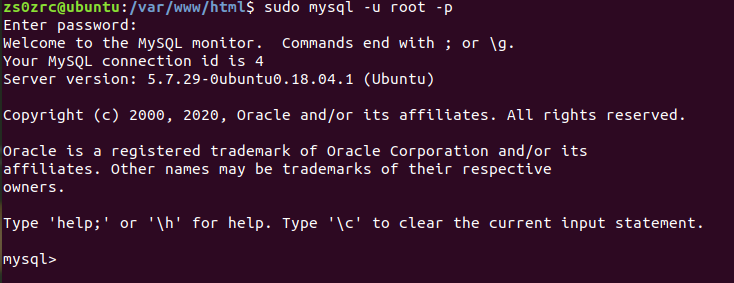
登录mysql
添加一个新的root用户,允许所有ip访问
mysql>GRANT ALL PRIVILEGES ON  *.*  TO root@"%" IDENTIFIED BY 'zs0zrc123456';
mysql>flush privileges;
修改mysql配置文件
sudo vim etc/mysql/mysql.conf.d/mysqld.cnf将
bind-address = 127.0.0.1修改为bind-address = 0.0.0.0重启mysql
sudo /etc/init.d/mysql restart
php
安装
sudo apt install php libapache2-mod-php php-mysql -y
基本配置
打开apache的配置文件
sudo vim /etc/apache2/mods-available/dir.conf


<IfModule mod_dir.c>
        DirectoryIndex index.html index.cgi index.pl index.php index.xhtml index.htm
</IfModule>
将index.php的位置移到 index.html前面,这个配置文件设置的是apache寻找文件的优先级。
重启apache
sudo systemctl restart apache2
写个index.php测试一下是否修改成功
< ? echo "hello world~";?>
然后访问就可以看apache选择了index.php文件了
这样,一个基本的web环境就搭建成功了。
通过docker搭建web环境
更新一下怎么通过docker搭建基本web环境
环境还是ubuntu18.04
首先给docker加加速
往 /etc/docker/daemon.json 写入下面的内容:
{“registry-mirrors”:[“https://registry.docker-cn.com"]}
然后重启服务
$ sudo systemctl daemon-reload
$ sudo systemctl restart docker
阿西吧,f**k,一直出奇奇怪怪的问题。折腾了一天,发现了个更简单的办法……直接拖对应的镜像下来就好了
命令:
docker container run -p 80:80 -d \
  --rm \
  --name lamp \
  --volume "$PWD/":/var/www/html \
  php:5.6-apache
参数作用:
-p 80:80 将容器80端口映射到主机的80端口上
--rm : 容器停止后自动删除
--name:指定容器名字
-d :容器以后台形式运行
--volum "$PWD/":/var/www/html : 将当前目录$PWD映射到容器中的/var/www/html
REFERENCE
本博客所有文章除特别声明外,均采用 CC BY-SA 3.0协议 。转载请注明出处!